How to Get Rid of Mold: The Step-by-Step Protocol (2026)
Step-by-step mold protocol: find the moisture source first, then DIY for under 10 sq ft on hard surfaces, then call a pro. Cost $500 to $30,000+.
You found mold. Most homeowners' first move is to spray something on it. The right first move is to find the leak.
Mold needs water. Dry wet or damp materials as quickly as possible, because prompt drying prevents growth in many cases. Spray a cleaner on mold while the leak is still running and it comes back. The cleaning protocols below work only after the moisture source is fixed; if you skip that step, you're going to do this twice.
Below: a 6-step protocol that starts with the moisture audit, then the visual ID, then the DIY-vs-pro decision threshold, then the actual cleaning protocol with surface-specific instructions, then when to stop and call a remediator, then how to keep it from coming back. Most household mold under 10 square feet on hard surfaces is a homeowner job per the EPA. Bigger areas, soaked porous material and HVAC involvement all push toward professional remediation, though what settles it is the extent, the material and how much disturbance the work takes rather than the measurement on its own.
Drew Fuller, who reviews this guide, runs Restoration 365, an IICRC-certified remediation firm in Willow Grove, PA. In his experience bleach is not a substitute for taking out contaminated porous material like drywall, wood and grout, or for fixing the water. Step 1 of getting rid of mold isn't a cleaner. It's a moisture meter.
In This Guide
- Step 1: Find and fix the moisture source (the audit before any cleaning)
- Step 2: Identify what you're dealing with (visual ID + species)
- Step 3: Decide DIY vs professional (the EPA benchmark + 5 other call-a-pro triggers)
- Step 4: The DIY protocol (under 10 square feet on hard surfaces)
- Step 5: When to call a professional
- Step 6: Prevent return (humidity control + monitoring)
- Where mold hides, room by room
- Health risks
- Cost ranges
Step 1: Find and fix the moisture source
Mold is a moisture problem. Cleaning the visible growth without finding the water source is what makes mold come back. Per the EPA's "A Brief Guide to Mold, Moisture, and Your Home," fixing the underlying moisture problem is the first published action in the official guidance, ahead of any cleaning step.
The 24 to 48 hour drying window
Mold spores are everywhere; they're in your house right now. What they need is moisture. EPA and CDC recommend drying wet or damp materials within about 24 to 48 hours, because prompt drying prevents mold growth in many cases. Drying does not sterilize the material, though: spores already in the material go dormant rather than dying, and they start growing again if it gets wet a second time. That is why prompt water-damage cleanup is the single most useful action a homeowner can take after a leak, flood, or burst pipe.
Common moisture sources by location
The visible mold tells you where to look. The actual leak is usually behind the wall, above the ceiling, or under the floor. Ceiling growth points upward almost every time, so the cause behind mold on a ceiling is where to start before you clean anything.
Bathrooms. Exhaust fan that discharges into the attic instead of to the outdoors. Caulk failure around the tub or shower. Toilet flange leak weeping into the subfloor. If the growth sits on the ceiling itself, mold on the bathroom ceiling has its own diagnosis path; read the pattern before you clean.
Bedrooms on exterior walls. Window condensation pooling on the sill. Insufficient insulation creating cold spots where humid air condenses behind drywall. HVAC supply-air register dripping from cold-line condensation.
Basements. Foundation crack water intrusion. Dryer vent disconnected inside the wall cavity. Sump pump that's failing intermittently. Cold-line condensation off uninsulated copper plumbing.
Kitchens. Dishwasher supply line slow leak. Refrigerator water line leak behind the appliance. Garbage disposal seal failure under the sink.
Attics. Roof leak after a hailstorm; ridge-vent failure; bathroom exhaust fan venting into attic insulation; ice dam damage from last winter.
Crawl spaces. Ground-vapor migration through unsealed earth; failing vapor barrier; HVAC duct condensation; foundation seepage.
The moisture-meter check
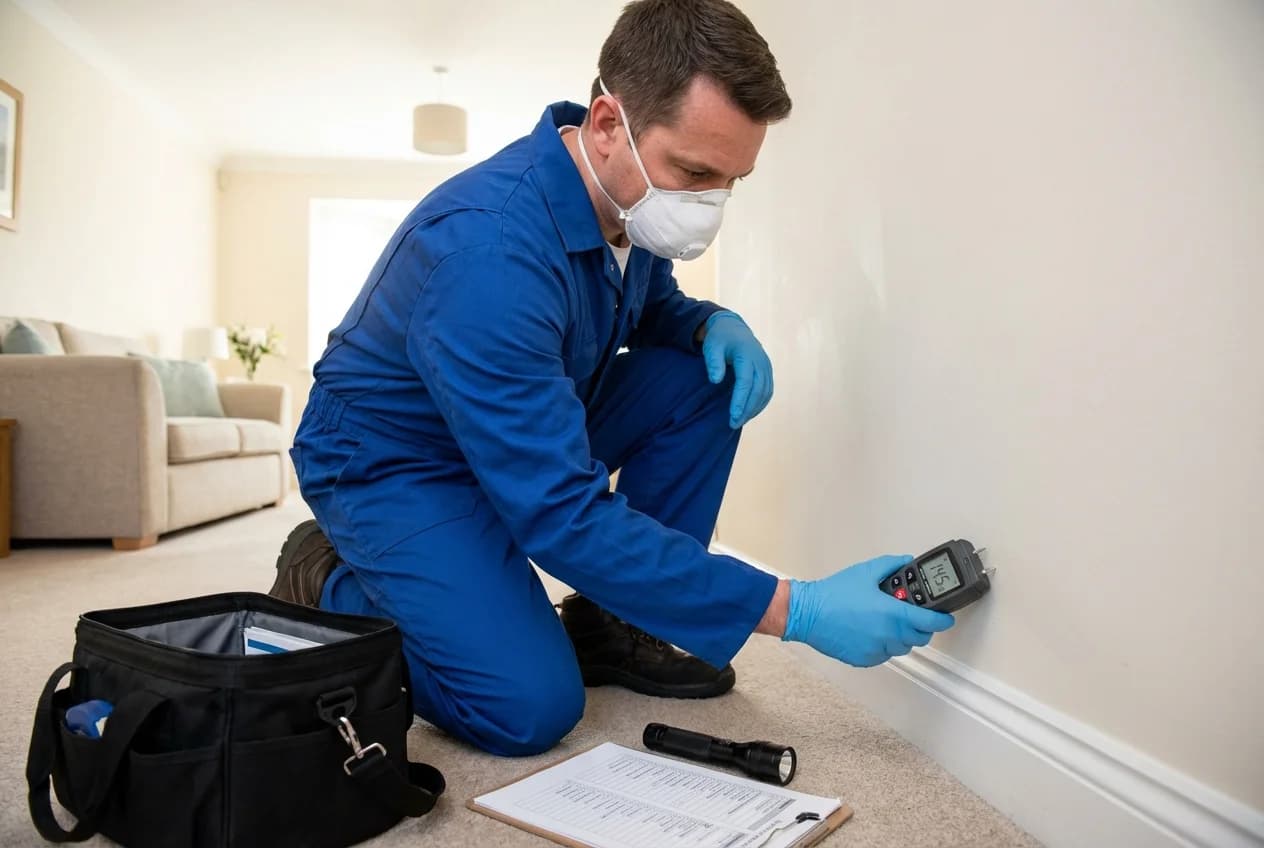
Before you clean anything, confirm the surface is actually dry. Take a reading on the suspect area, then take one on the same material somewhere you know is dry and compare them. That comparison is what remediators call a dry standard, and it is more useful than any single number.
Be careful about what the number means. ANSI/IICRC S500-2021 Section B reserves moisture content, a true percentage, for instruments calibrated to that specific material. Everything else reads a moisture level, which is a relative scale meant for comparison rather than a percentage you can check against a fixed cutoff. A pin-less meter run across drywall is usually giving you the second kind. Follow the scale in your meter's manual, and where the meter is calibrated for the material, use that material's dry standard. Thresholds quoted in articles, including any we might print here, are not a substitute for either.
A hygrometer reads ambient humidity in the room. The EPA's recommended target is RH 30 to 50%. Sustained readings above 60% raise condensation and mold-growth potential across the space, though humidity on its own does not establish that mold is growing everywhere. If your hygrometer shows 65 to 70% RH for weeks at a time, that is a building-wide moisture problem worth solving, not just a wall-spot problem.
A dry reading with the hygrometer under 50% supports the conclusion that you have found and fixed the source. It does not prove it. An intermittent leak, or one running behind a finished surface, can read dry on the day you happen to check. If the growth comes back, the source is still there.
If either reads wet, fix the source first. The cleaning is wasted effort until then.
Do you also need to test the air?
Moisture metering tells you whether the wall is wet. Sampling answers a different kind of question, and only sometimes. Per CDC guidance, if you can see mold the action is removal rather than confirmation, and the type generally does not need to be identified in order to clean it up. NIOSH does not recommend routine air sampling, and notes that a short-term spore count cannot be interpreted against health risk. Sampling earns its place when there is a specific question it can answer and the result can be read in context: growth you have reason to suspect but cannot locate, or documentation that a real estate transaction or insurance claim requires. What testing actually measures and what professional assessment costs cover the testing-side decision in detail.
Step 2: Identify what you're dealing with
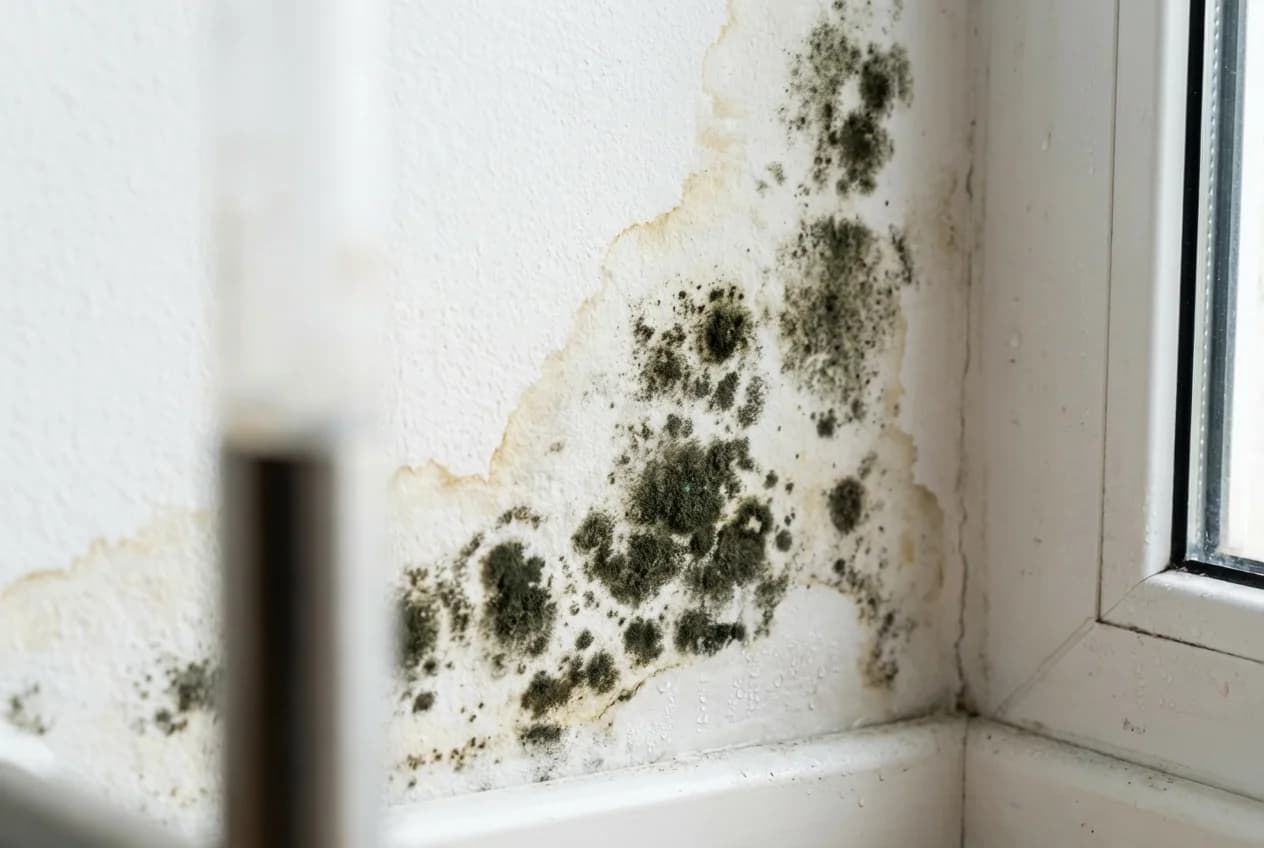
What decides the protocol is the material, how much of it is affected, how long it has been wet, whether disturbing it will put particulate into the air, and whether the HVAC system is involved. Growth on a hard surface in a small area is usually a homeowner job. Growth on soaked porous material, or anywhere in the HVAC, is not. Visual inspection can identify suspect growth and the materials it is on, but appearance alone cannot reliably identify the species, and routine laboratory microscopy often cannot identify it to species either.
The most common indoor species:
Stachybotrys chartarum (black mold). Dark green-black, often slimy, almost always paired with chronic water damage on drywall, ceiling tile, or paper-faced insulation. CDC's position is that no test proves an association between Stachybotrys and particular symptoms, and that all molds should be treated the same for cleanup. The practical caution stands regardless of species: disturbing contaminated porous, water-damaged material can release spores, fragments and other particulate into the air. Don't disturb without containment.
Aspergillus. Common indoor mold; shows up on HVAC supply ducts, attic spaces with poor ventilation, and basement walls with chronic minor moisture. Can be black, green, white, or yellow depending on species.
Cladosporium. Olive-green to brown; common on window sills, in bathrooms, and inside HVAC condensate pans. One of the few molds that grows in cooler temperatures.
Penicillium. Blue-green velvety surface; common on water-damaged paper, wallpaper, and insulation behind walls.
Alternaria. Dark green to black, fast-growing, common under sinks and around windows that condensate every winter morning.
What mold actually looks like has the full visual identification guide with species photos.
Our own precaution, not a CDC or IICRC requirement: where growth is dark and slimy and sits on material that has been wet a long time, we would treat it as the higher-disturbance case and leave it alone until it can be contained. That is a judgment about wet porous material, not about the species name.
Step 3: Decide DIY vs professional
According to EPA's "A Brief Guide to Mold, Moisture, and Your Home", if a mold-contaminated area is less than roughly 10 square feet, a 3-foot-by-3-foot patch, in most cases a homeowner can manage the cleanup with standard safety precautions. For larger areas, or more complex situations such as HVAC involvement, contaminated water, hidden growth or occupants with health concerns, professional remediation with containment and HEPA air scrubbing may be warranted.
Read the number as a benchmark rather than a cutoff. EPA presents it as general homeowner-cleanup guidance, not a legal or safety threshold, and it does not say that crossing it requires a professional.
When DIY is appropriate
- Visible patches under 10 square feet
- Hard, non-porous surfaces (tile, glass, metal, sealed concrete)
- Bathroom surface mold from condensation, with a working exhaust fan
- No one in the household with asthma, mold allergy, immune compromise, or active respiratory symptoms
- The moisture source is identified and fixed
When to call a professional
- More than roughly 10 square feet
- Growth on porous material that has been wet a long time, such as drywall, ceiling tile, or paper-faced insulation
- Mold inside the HVAC system or ducts
- Mold behind drywall, behind cabinets, or under flooring
- Sewage backup or contaminated-water source
- Mold keeps returning after DIY cleaning
- Anyone in the household reports symptoms they associate with the building
- A real-estate transaction or insurance claim that requires documentation
The DIY-vs-professional decision threshold walks through each trigger in detail.
Step 4: The DIY protocol (under 10 square feet)
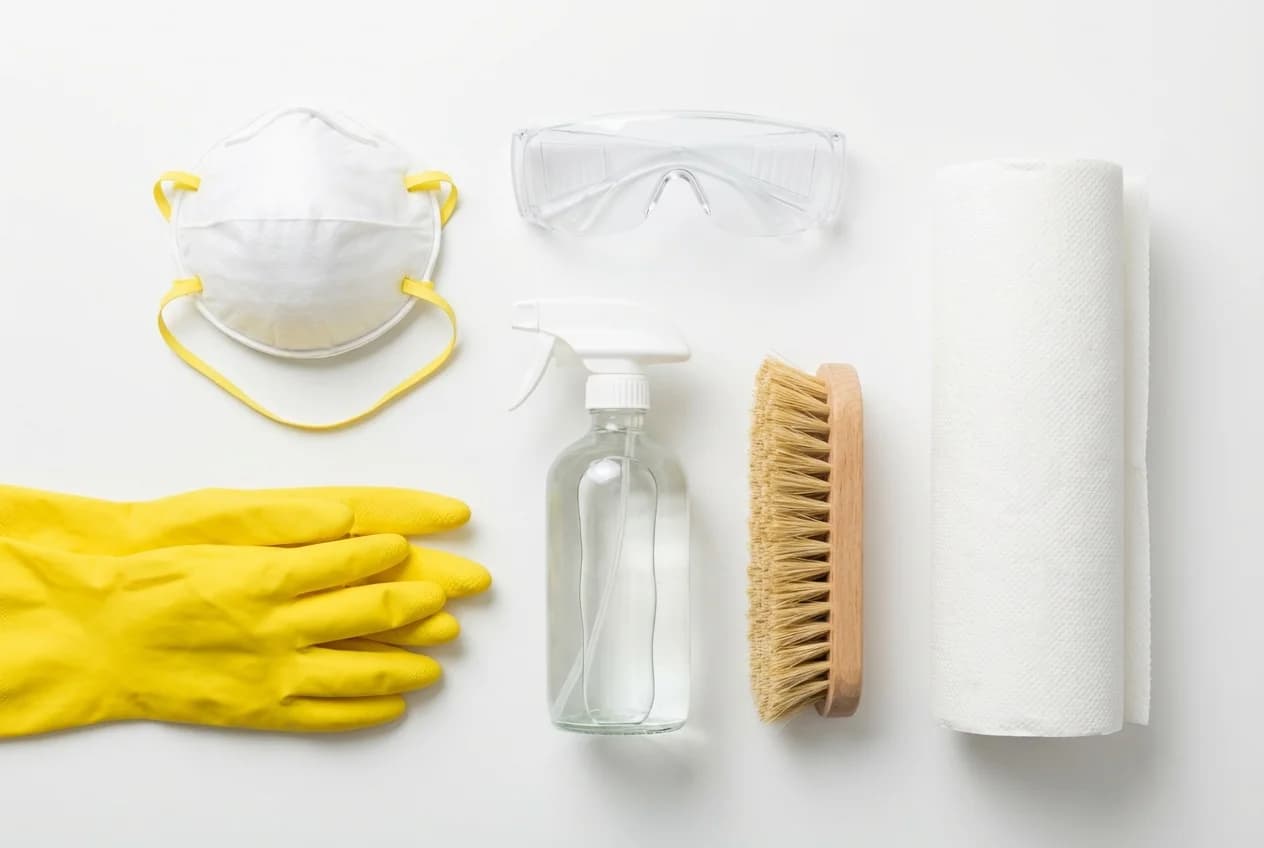
This is the EPA-supported homeowner scope. Past it, larger areas, porous material contaminated below the surface and HVAC involvement generally warrant more structured remediation, and may require the containment and HEPA filtration a homeowner doesn't have. What decides it is the extent, the material, the disturbance the work takes and who is exposed, not the square footage by itself.
Walls and drywall
Wall mold on hard, non-porous paint is a homeowner job. Wall mold on bare drywall or behind wallpaper is usually a professional job because the porous substrate retains spores below the visible surface. Reading the growth pattern first, the scrub-or-cut decision on drywall, and the wall-specific cleanup steps all live in the full mold on walls guide.
How to get rid of mold in the shower
Shower mold on tile, grout, glass, and caulk is the most common DIY job in this guide. The protocol differs by surface.
Tile and glass: EPA's baseline for a hard surface is detergent and water, scrubbed and then dried completely. Plenty of homeowners reach for 3% hydrogen peroxide instead, which is a reasonable household cleaner on a surface that doesn't absorb; if you use it, follow the directions on the bottle rather than a dwell time from an article. Either way: scrub, rinse, dry. Run the bathroom exhaust fan for 30 minutes afterwards.
Grout (porous): bleach is not the tool here. Grout is porous, and surface cleaning does not deal with contamination held below the surface. Detergent and water with a stiff brush along the grout lines is the baseline, then rinse and let it dry completely. Hydrogen peroxide is the usual household alternative; use it according to its own directions. Grout still stained after a thorough clean is generally colonized deeper than surface scrubbing reaches, and re-grouting is the honest fix.
Caulk: if the caulk is more than 50% colonized, it won't clean back to white. Cut it out, clean the substrate with peroxide, let dry, and re-caulk with mildew-resistant silicone. Trying to "save" failed caulk wastes hours.
Most important: confirm the bathroom exhaust fan discharges to the outdoors and not into the attic. A roof cap and an exterior wall vent are both fine; what matters is that the air leaves the building. Fans dumping into an attic pump humid air into the insulation, where it condenses on cold roof sheathing and grows the next mold colony directly above your bedroom ceiling.
How to get rid of mold in the bathroom
Bathroom mold beyond the shower is usually a humidity problem, not a cleaning problem. The fix is structural, not chemical.
The diagnostic: does your bathroom exhaust fan run during showers? Does it run for 20 minutes after? Does the fan actually move air, or is the motor spinning without pulling? Tape a tissue to the cover while it runs; if the tissue doesn't stick, the fan is dead and humidity is staying in the room every shower.
The cleaning protocol is the same as the shower: 3% hydrogen peroxide on tile, glass, and caulk; specific protocols above for grout and failed caulk.
The structural fix: replace dead exhaust fans (a $30 to $80 part, an afternoon's work). Add a humidistat-controlled fan if anyone in the household takes long hot showers; the humidistat runs the fan automatically when RH crosses 60%. Confirm the fan discharges to the outdoors rather than into the attic.
Bathroom mold prevention and cleaning goes deeper on the bathroom-specific moisture audit.
How to remove black mold
What changes the protocol here is not the species. It is that this growth usually sits on porous material that has been wet for a long time, and cutting or scrubbing that material puts particulate into the air that PPE has to defend against.
When to stop and call someone: dark, slimy mold paired with chronic water damage, growth inside drywall or ceiling tile, or anything in the HVAC system. Size is one input among those, not the trigger on its own: a large patch on sealed tile is a different job from a small one on soaked drywall. Don't spray, don't scrub, don't wipe; disturbing wet porous material puts spores and fine particulate into the air you are standing in.
For a small area of this kind of growth, under about 10 square feet, on a hard non-porous surface:
Stop and verify the surface before continuing. This kind of growth is usually on porous water-damaged drywall, ceiling tile, or paper-faced insulation; if your surface is any of those, the protocol below does not apply and disturbance is actively dangerous. The 6-step procedure is only for the less common case where it appears on tile, glass, sealed concrete, or another hard non-porous surface that won't aerosolize spores when disturbed. If you're not sure which surface you have, stop and follow our how to get rid of black mold guide instead. Disturbing water-damaged porous material is a respirator situation, not a household-cleaner situation.
- At least a NIOSH-approved N95 respirator. More protective half-face or full-face protection may be appropriate here, because cutting or scrubbing long-wet porous material is high-disturbance work
- Tyvek protective suit and nitrile gloves
- Tape 6-mil polyethylene with red builder's tape across the doorway and HVAC return
- Wet the surface with the peroxide solution before any scrubbing (wet disturbance reduces aerosolization)
- Place removed material in durable sealed bags or containers, using heavier-gauge polyethylene and double-bagging where needed to prevent puncture or leakage
- Keep ventilating or filtering the area until the cleanup is finished and the surfaces are dry, rather than for a set number of hours. On a professional job the equivalent decision follows the containment and completion criteria for that project
If any of those steps sound beyond what you want to do alone, that's the signal to switch to our how to get rid of black mold guide, or stop and call a certified remediator instead of doing this yourself.
What to use: hydrogen peroxide vs vinegar vs bleach
The bleach myth is everywhere on the internet. Bleach doesn't penetrate porous materials, and ANSI/IICRC S520-2024 §1.4 calls physical removal the primary means of remediation, treating attempts to kill or encapsulate mold instead of removing it as generally not adequate. Per EPA guidance, using a biocide such as chlorine bleach is not recommended as a routine practice during mold cleanup. CDC does allow a dilute bleach solution, no more than 1 cup per gallon of water, for household cleaning of hard surfaces. Both can be true: bleach is a reasonable household cleaner on tile, and it is not what remediation runs on. Here's the surface-by-surface map:
| Surface | What works | Notes |
|---|---|---|
| Tile, glass, sealed concrete (non-porous) | Bleach OR 3% hydrogen peroxide OR vinegar | Bleach is fine here; the surface doesn't absorb |
| Painted drywall (sealed) | Detergent and water, or 3% hydrogen peroxide per its own directions | Not a bleach job; if growth returns after cleaning, the drywall behind is holding moisture |
| Bare drywall, wood, grout, caulk (porous) | Can it be cleaned and dried? Drywall soaked through is the replace case; a damp grout line usually is not | Surface cleaning does not reach contamination held at depth |
| Fabric, paper, insulation | Don't try; remove and replace | Porous; spores survive at depth |
Vinegar vs bleach for porous surfaces goes deeper on white-distilled vinegar specifically; its antifungal activity is real but narrow, effective on grout but ineffective on heavily colonized drywall.
PPE and ventilation
Wear at least a NIOSH-approved N95 respirator for mold cleanup. More protective half-face or full-face respiratory protection may be appropriate for prolonged, dusty or high-disturbance work; the selection should follow the task and the expected exposure, not the mold species alone. Goggles (sealed, not safety glasses); nitrile gloves; long sleeves and pants. Run a window fan exhausting outward to depressurize the work area while you clean; close the HVAC supply to the room you're working in.
After cleaning, keep the area ventilated until it is dry before re-occupying it. Wash work clothes separately from household laundry.
Step 5: When to call a professional
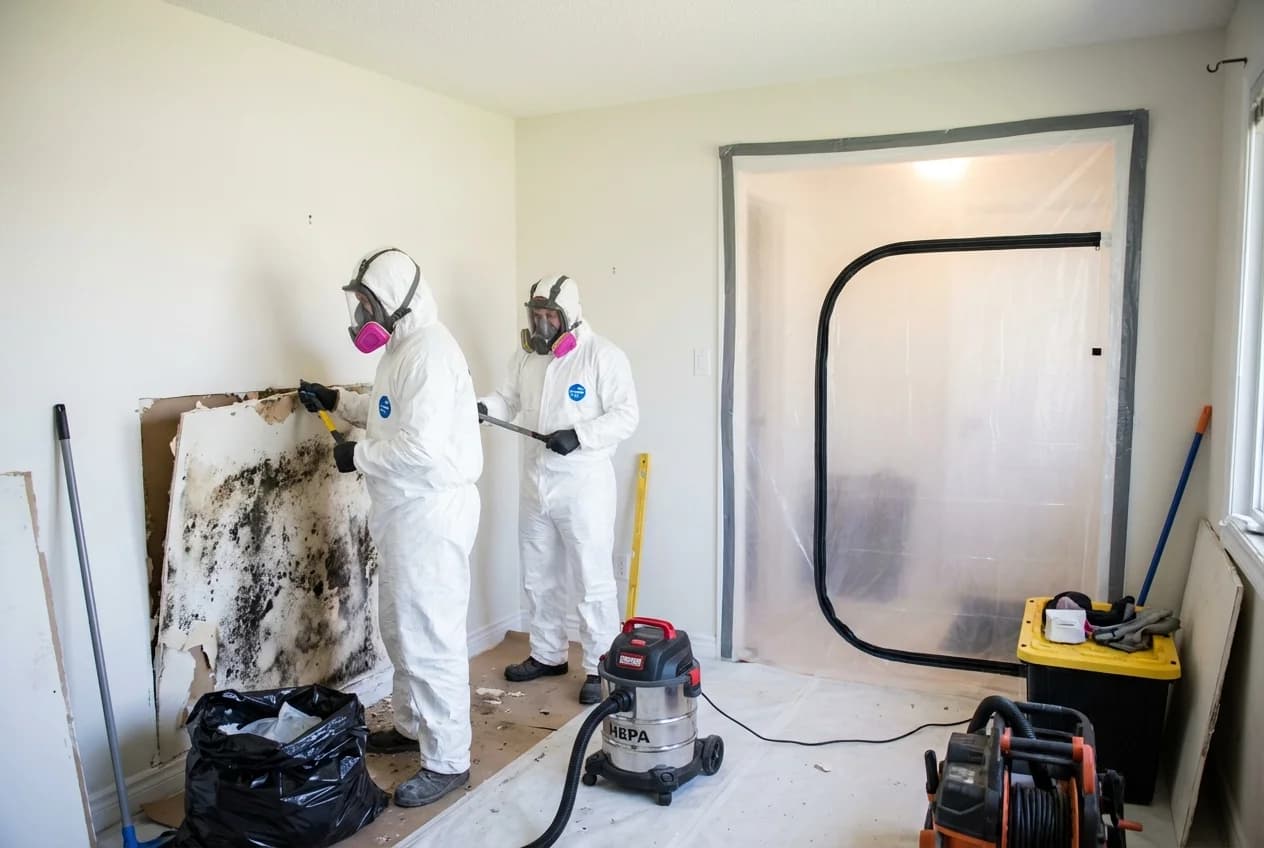
EPA's 10 square feet is a homeowner-cleanup benchmark rather than a legal or safety threshold. There are also five other triggers worth weighing regardless of size.
HVAC mold. A contaminated HVAC system can distribute mold spores or fragments beyond the source area. If contamination in the ducts, the air handler or the condensate pan is known or suspected, do not run the system until it has been evaluated. This is professional territory; duct interiors aren't something a homeowner can reach or clean properly, and EPA recommends replacing wet or moldy fiberglass duct material rather than cleaning it.
Sewage or grossly contaminated water. ANSI/IICRC S500-2021 §10.4.1 sorts water by how contaminated it is rather than by what caused it. Category 3 is grossly contaminated water that can contain pathogenic, toxigenic or other harmful agents. The standard's examples include sewage, certain wasteline backflows, flooding from seawater, and rising water from a river or stream. Water that started clean can deteriorate into Category 3 if it sits.
What the category changes is concrete. Under §10.6.7, Category 1 water can be handled without contamination controls, while for Category 2 or 3 the remediation should happen before any restorative drying and the restorer shall use contamination controls and appropriate worker protection. That obligation is the reason we would call a professional here rather than a general preference: containment and worker protection are what the work requires, and they are not things most households are set up for.
Recurrence. If you've cleaned a spot more than once and it keeps coming back, the moisture source isn't fixed. Call a qualified mold assessor or indoor environmental professional before you clean again; they'll find the leak. Licensing requirements for assessors and remediators vary by state and locality, so what you are looking for is the right qualifications rather than a particular license everywhere. We recommend the assessor and the remediator be different companies, so the firm finding the problem isn't the one billing to fix it. That's our position, not the standard's: ANSI/IICRC S520-2024 §1.2.1 dropped the blanket independence rule the 2015 edition carried. It kept a narrower one that covers most people reading this. If health issues are reported, an independent IEP or other appropriate professional should be engaged to conduct the assessment, and that assessment should be documented and reported to you.
Health symptoms. If anyone in the household reports symptoms they think may be building-related, that is useful exposure history and worth raising with a doctor, though it does not by itself establish mold as the cause. It is still a good reason to avoid uncontrolled disturbance: professional containment with HEPA filtration protects the whole household in a way DIY disturbance does not.
Structural damage. Mold paired with rotted wood, soft drywall, or warped flooring is past cleaning territory. Materials need replacement, which is demolition and remediation work rather than cleaning. Licensing requirements for that work vary by state and locality.
Professional remediation pricing covers the ranges by project size and state. Most professional remediation runs $1,500 to $5,000 for a medium project; whole-house can hit $10,000 to $30,000.
Step 6: Prevent return
The single most useful thing you can do to keep mold from coming back is keep ambient humidity at 30 to 50% RH year-round per the EPA's recommended target. Everything else is downstream of humidity.
Humidity monitoring. A $15 hygrometer in the most-affected room. Check it weekly. If RH drifts above 60% for more than a few hours, find out why before you re-clean anything.
Dehumidifier sizing. Size the unit on both the size of the space and how damp it actually is, not on floor area alone, and follow current manufacturer or ENERGY STAR sizing guidance rather than a rule of thumb. Humid climates and wetter spaces need more capacity and longer run times than the same square footage somewhere dry.
Bathroom exhaust. Run the fan during every shower and 20 minutes after. Replace the fan if it's not actually moving air. Discharge to the outdoors, never into the attic.
HVAC service. Annual service includes condensate-pan cleaning and coil inspection. The half-inch of standing water in the pan most homeowners have never opened up to see is a year-round Cladosporium colony.
Foundation and roof. Annual gutter cleaning; storm-damage roof inspection; foundation crack monitoring. Water intrusion at the building envelope is the source of most basement and attic mold.
Humidity control to prevent return has the full prevention checklist by season and climate.
Where mold hides, room by room
Different rooms face different risks. The bathroom-vs-basement-vs-attic-vs-crawl-space breakdown matters because the moisture source and the cleaning protocol both differ.
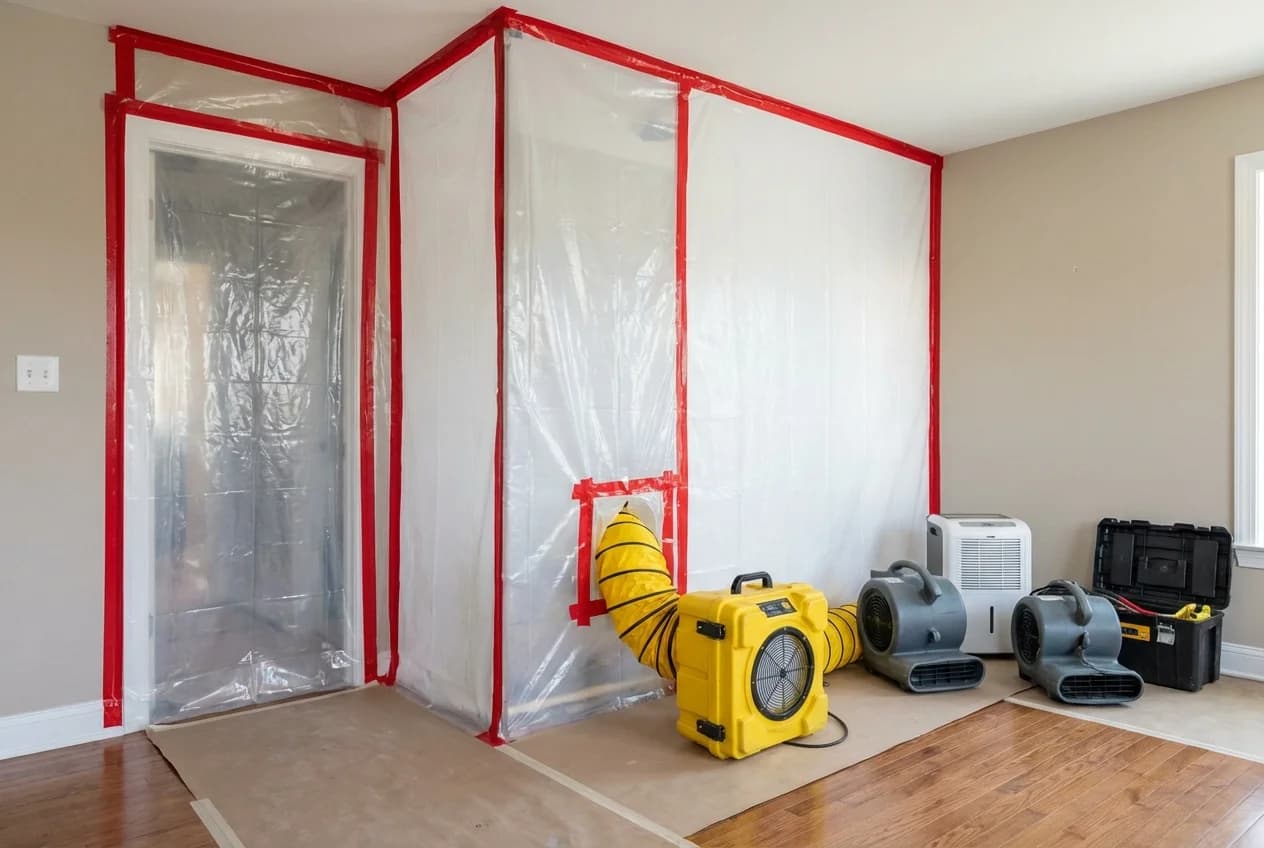
Bathrooms
Daily humidity spikes plus organic material plus warm temperatures equals mold-friendly conditions. The cleaning protocol is in Step 4 above; the structural fix is the exhaust fan and venting. The full bathroom moisture audit covers bathroom-specific moisture sources room by room.
Basements
Below-grade walls condensate against humid summer air; foundation cracks weep groundwater; sump pumps fail intermittently. Basement mold often spreads behind paneling and inside finished walls before the homeowner sees a visible patch. Basement mold causes and solutions covers the full basement audit.
Attics
Roof leaks; ridge-vent failure; bathroom exhaust fans venting into the insulation; ice dam damage. Most homeowners visit their attic once a year, so attic mold runs unchecked for months. Attic mold detection and removal walks through the attic-specific signs.
Crawl Spaces
Ground-vapor migration; failing vapor barrier; HVAC duct condensation. The "stack effect" pulls crawl-space air up through the home, so crawl-space mold affects whole-home air quality even when it's invisible from upstairs. Crawl space mold encapsulation covers vapor-barrier and encapsulation work.
Health risks
Mold affects people differently, and susceptibility varies a great deal from one person to the next. Exposure to damp and moldy environments is associated with allergy-like and respiratory symptoms in susceptible people: congestion, eye irritation, sneezing, cough. People with asthma, mold allergies, immune compromise, or chronic lung conditions face more serious risks. CDC's position on species is that all molds should be treated the same for health risk and removal, so the thing to act on is the exposure, not the color of the growth.
Certain individuals face more serious health risks from mold exposure:
- People with asthma or mold allergies
- Immunocompromised individuals
- Infants and young children
- Elderly adults
- People with chronic lung disease
If you or family members experience persistent respiratory symptoms that improve when away from home and return when you're back, consult a healthcare provider. What mold exposure does to your body covers the symptom-pattern test and when to see a doctor.
Cost ranges
Remediation cost varies by scope, location, and material involvement. The EPA-defined size brackets:
| Project Size | Typical Cost Range |
|---|---|
| Small (under 10 sq ft) | $500 to $1,500 |
| Medium (10 to 100 sq ft) | $1,500 to $5,000 |
| Large (100+ sq ft) | $5,000 to $15,000+ |
| Whole house | $10,000 to $30,000+ |
Costs run 30 to 60% above national average in tropical-load states (FL, HI, LA, coastal TX) and in NYC; they run lower in low-humidity regions (AZ, NM, eastern CO). What remediation typically costs breaks this down by state with assessment and remediation pricing separated.
Insurance. Most homeowners insurance does not cover mold from ongoing humidity or maintenance issues. Mold from a "covered peril" (sudden burst pipe, hurricane, fire) is often covered with caps. Check your specific policy before you assume.
Next Steps
If you've identified or suspect mold in your home:
- Find the moisture source first. Mold can't grow without water. The cleaning protocol below works only after the source is fixed.
- Document what you see. Take photos with a ruler in frame for size reference. Note the location and any moisture indicators (water stains, peeling paint, musty smell).
- Confirm the size. Is it under or over roughly 10 square feet on a hard surface? That is EPA's homeowner-cleanup benchmark, not a hard cutoff.
- Don't disturb dark, slimy growth on material that has been wet a long time. Disturbing it puts fine particulate into the air; call a professional.
- Pick the protocol. DIY for small areas on hard surfaces (Step 4 above); professional for everything else.
Find a Verified Mold Professional
Don't trust your home and health to just anyone. Find verified mold professionals in your state and compare what we could verify for each one before you call.
This guide is for educational purposes only and is not a substitute for professional advice. Always consult certified professionals for specific mold situations in your home. If you experience health symptoms, please consult a healthcare provider.
Frequently Asked Questions
What kills mold permanently?
Can you stay in a house with mold?
How fast does mold grow after water damage?
Does bleach kill mold?
How do you know if mold is making you sick?
Is it safe to remove mold yourself?
When DIY isn't the right call, you can find a professional mold remediation company on Verified Remediation. Every contractor is identity-checked and tier-ranked, with licenses, insurance, and reviews verified where available.